Aside from painting and pottery, I make paper.
Paper-making requires a source of extreme pressure and in the past, this source has been my car. However, the most pressure I could get from my car was the weight I could get from one tire, which was only one quarter the weight of the car (1,000 pounds). This worked, but not quite enough to really get the excess water out and squeeze the paper fibers together. It also wasn’t good to use if the weather was bad.
Recently, my good friend Chris and I attended a paper-making class at the Southwest School of Art. Their specialized paper studio used a massive steel press with five-ton bottle jacks to squeeze the moisture out of our paper. Seeing this inspired me.
When I got home, I rummaged through my garage and found some pieces of 3/4 inch plywood and my two-ton bottle jack. After a quick trip to my hardware store for some bits and pieces, I was ready to make my own high pressure paper-press.
Here’s what it took to make:
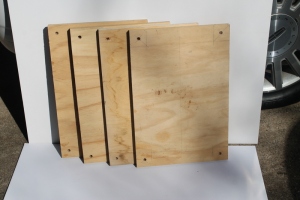
- 6 each – 3/4″ plywood cut to 12″ x 18″
- 4 each – 3/8″ threaded rods at least 18″ in length
- 4 each – 3/4″ PVC cut to 12″ length
- 12 each – 3/8″ nuts
- 12 each – 3/8″ flat washers
- 8 each – 3/8″ fender washers
- 8 each – 3/8″ lock washers
- 2-Ton Bottle Jack
- Some small plywood scrapes
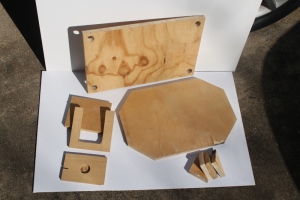
Power saw in hand I cut up the plywood into the sizes listed above. Out of some 3/4″ scrapes cut a 5″ x 5″ piece which would become the center base and I cut a piece of 1/2″ plywood into the shape of the letter “C” to be used to center the jack in the press.
To accommodate the threaded rods, I drilled a 3/8″ hole in each corner of the base and top pieces. To ensure proper alignment I stacked the pieces together and drilled through all four at once.
For the platen, I drilled a one-inch hole in each corner for the PVC guide pieces. These were centered on the holes I drilled in the base and top pieces. For the second piece of the planten, I cut two inches off the corners so the PVC would only have to pass through one piece, lessening the chance of jamming. The two inch pieces are what I used for the corner feet of the base.
All the plywood was doubled-up so the base, top section, and platen ended up being one and a half inches thick. A two-ton jack would distort or just bust apart anything thinner.
When gluing things up, aside from C-clamps, I used the threaded rods to clamp everything together while the glue dried. This helped ensure everything would be nice and tight.
Next, I glued the corner pieces to the bottom of the base, as well as the center base piece which would distribute the pressure and prevent the base from bowing. I also countersunk two galvanized screws into this center piece.
I drilled a inch-inch hole is each of the corner pieces to accommodate recessing the bottom nuts and washers. This will also allow me to disassemble the press later if ever needed.
The size of the “C” shape piece used to align the jack in the exact center of the press was cut to match the base of my jack. This piece will jack alignment an easier matter.
Since the wooden pieces would be getting wet quite often, I coated everything with multiple layers of exterior polyurethane. Being open grained, all the plywood edges received an extra coat.
All that was left was assembly and trying it out.
With the 2-ton jack in place my new paper press will use as much force as my entire car, helping me to be successful on my paper-making journey.


Oh, here it is! I put everything in caps. All of the corrections are in the last third of the blog. Good job, Sweetie! Xoxoxoxoxxoxoxoxoxoxoxoxoxoxoxoxoxoxoxoxoxoxoxoxoxox ss
LikeLike